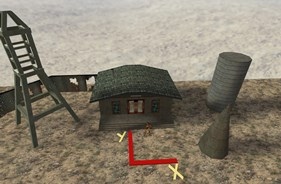
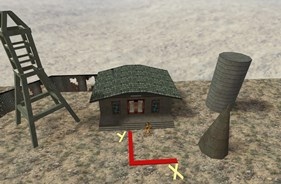
The most important part of your map general look is light. You can place point light, spotlight for nice spot effect, and texture lights for best light effect. The last method is recommended to use in place of point light. 1. Make sure you have created room with info_player_start. Let's put some lights.
Point Light
 The simplest light you can use in your map. The simplest light you can use in your map.
1. Place light entity. It's a light source that can be highly customizable.
2. Change keyvalues to customize light:
name --> entity can be turned on/off by triggering it's name.
brightness --> color and brightness of light. The first three values determines color
(you can specify it by pressing "pick color" button). The last value determines true brightness:
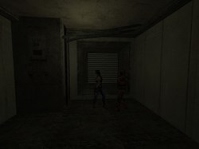 | 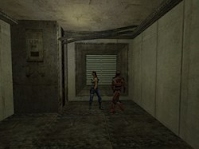 | 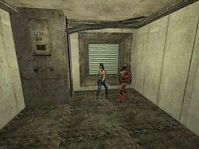 | | Brightness 50 | Brightness 100 | Brightness 200 |
appearance --> Type of light appearance. Requires entity name set to work.
custom appearance --> Defined by 64 characters from "a" to "z", where "a" is maximum dark and "z" is fully bright.
See entity reference for more info.
3. Now let's go into "flags" tab:
initially dark --> light is turned off by default.
remove entity --> obsolete when using newer compilers.
Placing too many light behind each other may cause compilation errors.
Spotlight
 Create Spotlight Effect. Create Spotlight Effect.
1. Place light_spot entity. It's a spotlight source that can be directed anywhere.
2. Change keyvalues:
name --> entity can be turned on/off by triggering it's name.
target --> name of the entity that spotlight is facing. You can specify info_target name for invisible light target. You can use Pitch keyvalue instead of using target. Also Pitch Yaw Roll works as well.
brightness --> color and brightness of light. The first three values determines color
(you can specify it by pressing "pick color" button). The last value determines true brightness:
 |  |  | | Brightness 150 | Brightness 300 | Brightness 450 |
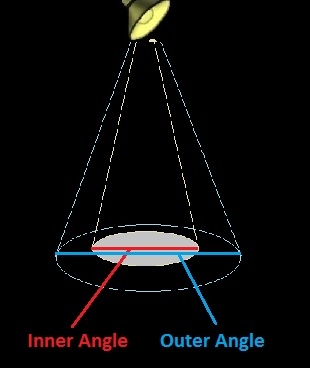
inner (bright) angle --> the angle of the full light circle created by spotlight. outer (fading) angle --> the angle of fading lightning cone.
| | Each of those keyvalues creates unique light effect, so you can use either one or two light cones.
Inner angle creates full lit light circle on the surface, with no fading effect, just circled light with sharp edge.
Outer angle creates fading effect, that makes circle full lit at the center and completely dark at the edge.
If you don't want to use one of those light cones, just type "0" as a value of the key.
Using two keyvalues produce light, that starts fading from certain point.
Test different values to achieve desirable effect. |
pitch --> target of the light used when target keyvalue is not specified. Range from -90 (facing down) to 90 (facing up). is sky --> use light_environment to produce sky light instead. appearance --> type of light appearance. Requires entity name set to work.
custom appearance --> Defined by 64 characters from "a" to "z", where
"a" is maximum dark and "z" is fully bright. See entity reference for more info.
Exterior Light
 Create sunlight, moonlight or other environmental lights. Create sunlight, moonlight or other environmental lights.
1. Make sure you have at least one room with "SKY" texture. If you don't know how to create exterior area, see quick guide below. Place light_environment entity. This entity is global -location of entity does not matter. Keep in mind that light_environment will affect all exterior areas with "SKY" textures, so you need
to place only one light_environment in the map.
How to create exterior area.
1a. Create room as regular. Make it huge and decorate it. Keep in mind that in-game sky illusion is just a tool texture
in editor:
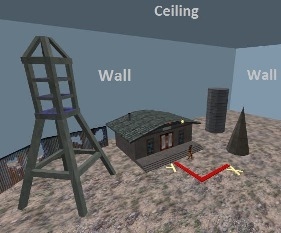
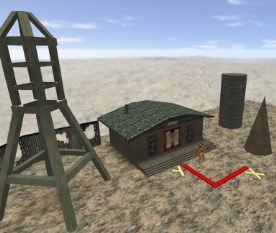
1b. Texture all desirable faces using "SKY" tool texture. All textured faces represents sky. At the left picture all walls and ceiling are textured with "SKY". Those walls must be solid (can't be mark as entities). Also note that the whole brush
must be textured with "SKY" texture, or light_environment won't cast a light.
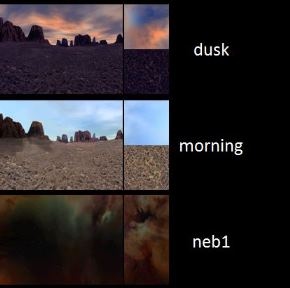
1c. Choose a sky- Half Life and Sven Co-op have a lot of skies to choose from. Check Sky List page for a list of skies.
All sky textures are stored at "svencoop/gfx/env" folder. Now pick a name of sky, and write it into: map --> map properties --> environment map keyvalue (e.g. 2desert),
(ignore bracket with "cl_skyname" string, you don't need to add prefix to sky name).
You can manually found a sky you want to use, in that case go into:
"common\Half-Life\svencoop\gfx\env" for list of Sven Co-op skies, or:
"common\Half-Life\valve\gfx\env" for list of Half Life skies.
When choosing a sky name manually you probably noticed that every file represent only part of the whole sky texture. You need to specify the name of sky texture WITHOUT two last letter of file name, e.g. when you want to use "alien1.lf" texture which is a part of "alien1" texture group, you need to specify only "alien1" into environment map name keyvalue.
1d. Don't forget to place and configure light_environment.
You can use any other light type, or not using light at all. The sky is always full lit, but the map turns completely black in unlit areas.
2. Configure your light by setting up keyvalues:
name --> this keyvalue is redundant. pitch --> determines position of the virtual sun. Different values gives different shadows casting in exterior areas. Use it along with Yaw compass in top right corner of the light_environment properties windows:
Pitch can be negative, or positive. Default value (0) makes light have it's source at the horizon. Negative values bring light source higher, where -90 mean light_environment to face straight down. Positive values makes light_environment to cast light from beneath, in this case the whole area turns shaded. Change yaw to determine angle of the light source. Look picture below for different light positions set ups:

Different Pitch Configurations: 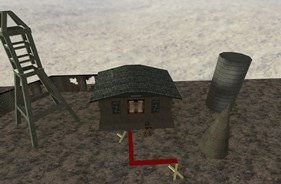
Pitch 0 | 
Pitch -15 | | Pitch -25 | Pitch -50 | 
Pitch -75 | 
Pitch -90 |
| Used settings: Yaw='0' and Brightness='255 234 156 100' |
brightness --> color and brightness of light. The first three values determines color
(you can specify it by pressing "pick color" button).
There is possibility to have multiple light_environment in map. Check Advanced Light Commands tutorial for more info.
Texture Lightning
Make textures emit light. It's a best way to light up your up. Texture lightning gives more natural feeling than point light entity.
1. Place info_texlight entity in your map. The location of entity does not matter.
2. Decide which textures will emit light in-game. Disable smart edit mode. Change key to texture name, and the value to light brightness like: 255 255 128 2000- where first three values represents color of the light, and the last one is true brightness. Use Windows color picker or just copy light brightness from another light entity. Texture light is weaker than regular lightning,
so brightness value should be significantly higher.
Brightness values depends on texture size and scale. Achieving ideal light value may require multiple map testing and patience. Check Advanced Light Commands tutorial for more advanced light control on your map.
|
|


