A lot of effects can be created, fire, smokes, fog, sparks, lasers, blood. bubbles or even model shooter!
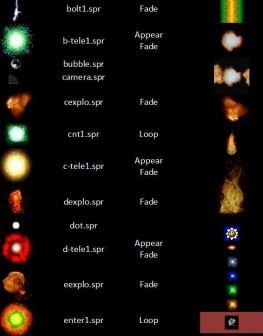
Check sprites list for all available effects. 1. Make sure you have created room with light and info_player_start.
Sprites (Fire, Smoke, Glow, Rendered Images)
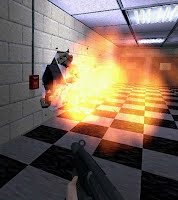
Fire, glow, smoke or any other 2D image can be placed into to map to simulate anything you'd like to.
1. Place env_sprite on the map. It can be light glow, fireplace, smoke e.t.c. The visual effect depends on sprite name value.
2. Set up keyvalues:
name --> required for enabling/disabling sprite by triggers.
render fx --> set it to constant glow if render mode is "Glow" and you don't want sprite resizing
upon player approaching. render mode / fx amount --> set it to "Glow" or "Additive" with desired FX Amount (transparency):
For example set render fx to glow, with full visibility (fx amount 255) to have fully visible sprite. Choose the sprite file before you use these settings for better preview. Jackhammer Editor also support transparency preview.
framerate --> if sprite is animated you can set custom frame rate.sprite name --> the name of sprite file from 'sprites/' folder. Check sprite list.scale --> change sprite size. 1 is default.
3. Flags tab options:
starts on --> sprite is visible on map start. play once --> sprite appears only once, then it turns invisible. once + remove --> the sprite is removed from the map after use.
4. Placing few sprites behind each other may give 3D feeling (e.g. steam emitted by broken pipe that moves in certain direction).
Don't forget to complete some effects by placing other entities, for example fire may damage players only by placing trigger_hurt within the fire sprite.
Intense smoke
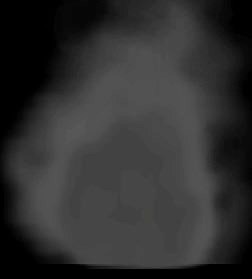 Smoke can be made through env_sprite, but there is one more entity that emits big, Smoke can be made through env_sprite, but there is one more entity that emits big,
intense and animated smoke. Additionally can render custom sprite.
1. Place cycler_wreckage on the map. It's the point where smoke is emitted.
2. Set up keyvalues:
name --> required to enabling or disabling this entity in game by triggering it.
framerate --> frame rate of the animated sprite, if chosen.
sprite name--> name of the custom sprite to render underneath the smoke.
scale --> scale of the custom sprite, if chosen.
3. Set up flags:
starts on --> smoke is enabled by default.
toggle --> can be turned on and off rather than emitting smoke once. Seems to not working while start on flag is enabled.
Custom sprite is additional feature, you don't need to specify it. Custom sprite is barely visible under emitted smoke.
Fog
 Fog may be emitted by placing huge env_sprite entities in certain area. There is also another method to emit the fog in the whole level.
1. Place env_fog on the map. It is enabled by default.
2. Keyvalues to set:
name --> used for enabling/disabling by triggering.
fog color --> color of the fog.
start distance --> distance of the fog where it starts appear.
end distance --> distance of the fog where is fully opaque.
Start distance must be more than 0, end distance can't be lower than start distance.
3. Select starts off flag in the flags tab to disable the fog on map start
(it will require trigger to enable it).
Explosion
 Simple explosion with smoke, decal and damage can be applied by one entity.
1. Create env_explosion entity in the place where you want your explosion.
2. Set keyvalues:
name --> required to emit explosion by triggering it.
magnitude --> how big explosion is and how much it will hurt.
3. Set keyvalues:
repeatable --> the env_explosion can be used repeatably.
no damage --> explosion will not cause damage.
Use other flags to disable some visual effects of explosion.
You can create your own explosion by setting up trigger_hurt, ambient_generic,
env_sprite and other entities to customize damage, radius, sounds and visuals
of explosion. This method is recommended for experienced users -it requires advanced triggering management.
Laser and Beam
Laser can be created by placing env_laser entity into the map. That will create a trail between this entity and the target entity. Env_beam is more advanced trail that have start and end points specified by map maker.
1a. Create env_laser and place it wherever you want your laser have starting point.
1b. Choose the end point of laser. It can be almost every entity you want (entities that stores it's physical position on the map).
* Target can be invisible (choose info_target entity for example).
* Target can have movement (you can set the target to func_train).
* Target must have name.
* Multiply targets can be used (they need the same name).
* If target is a brush entity (e.g. func_train), it requires origin brush.
* If all targets gets destroyed somehow, the laser won't stop work,
and the ending position of the laser freeze in the place where the last target
entity stopped exist.
* Laser will bravely try to reach the ending point (target of the laser),
but can be interrupted by solid brush or every entity with collision like
monster, player, func_pushable, func_wall_toggle e.t.c.)
When using more than one target, the laser will randomly pick the target from all available targets every 0.1 second.
Center of the brush covered with "ORIGIN" texture will be the laser end point when using brush entities as a target of laser. If no origin found, the laserending position is set at the world center (0,0,0 coordinates).
1c. Now it's time to customize laser by setting keyvalues:
name --> required if you need turning on/off laser to be possible.
target of laser --> must be set to name of end point entity (see above).
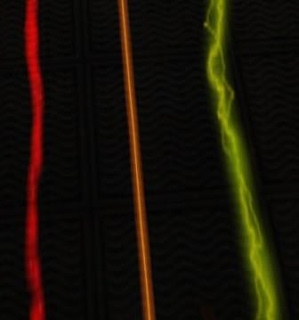
Lasers with multiple target of lasers and decal end flag enabled.
brightness --> higher values make laser less transparent.
beam color --> trail color, darker values makes it less visible.
width of beam --> how width the trail is.
amount of noise --> higher values = more noise (deflection from straight line).
High amount of noise
sprite name --> the name of sprite file from 'sprites/' folder. Check sprite list.end sprite --> sprite that emits at the laser end point. File name starts in 'sprites/' folder, check sprite list for available sprites.texture scroll rate --> how fast the trail texture scrolls (from start to end).starting frame --> at which frame animated sprites in this entity starts.damage / second --> the damage dealt by a straight line between start and the end points of the laser. Beam applied by noise won't change the area of damage (it will still damage in a straight line).
1d. Set flags if needed:
start on --> the beam is enabled (turned on) at map start.
startsparks --> the spark effect will be generated at starting point of trail.
endsparks --> the spark effect will be generated at ending point of trail.
decal end --> generate the scorch decal at the laser end.
2a. Entity Env_beam works the same way as laser, but have more features.
* Beam need starting position, not like in the env_laser entity where starting position is env_laser itself.
* Beam can't generate sprite at the end of trail (like env_laser do).
* Beam can be used to simulate laser circle (ring), but it's recommended
for advanced map makers due to hard configuration.
Choose the staring entity and the ending entity of the beam the same way as choosing ending point for env_laser (check subsection 2a).
2b. Beam have the same keyvalues as env_laser, except those:
start entity --> must be set to name of start point entity (see above), unless you want random striking within the specified radius around env_beam entity (note that the ending entity keyvalue must be unspecified).
ending entity --> must be set to name of end point entity (see above), unless you want random striking within the specified radius around start entity.
radius --> the beam will strike randomly within this radius depending on start entity and end entity settings.
life --> duration of the beam to appear after turned on.
frames per 10 seconds --> frame rate of beam sprite (if sprite is animated).
strike again time --> delay before generating another beam after the previous one's lifetime exhausted, can be negative. Works only in two cases :1 there's possibility to trigger env_beam repeatedly (toggle flag must be on).2 beam have multiple targets.
2c. Beam have the same flags as env_laser, except those:
toggle --> beam can be multiply triggered.random strike --> replaces static strike again time number by random value between zero and strike again time.ring --> advanced feature, create a laser circle between two points instead of straight line.shade start --> the beam fades away at starting point. Only infinite life.
 Beam with shade start enabled.
shade end --> the beam fades away at ending point. Only infinite life.
Using shade start and shade end at the same time does not work.
Spark
 Generate sparking in entity location with customize frequency . Sound included.
1. Place env_spark in a location of you wish.
2. Change keyvalues:
name --> required for enabling/disabling spark by triggering it.
max delay --> delay between sparks (random value between 0 and max delay). Only works with toggle flag.
2. Set flags:
toggle --> generates spark continuously instead of generating it once.
start on --> spark is active on a map start.
Toggle flag makes infinite sparking. Effect can be turned off by triggering spark. Selected start on flag without toggle flag makes spark appear once at the maps start, that's rather useless.
Screen Fading
Screen fade is a screen effect that can affect single player or the whole team.
Screen can fade TO or FROM solid color or apply a color filter on the screen.
1. Place env_fade into the map in any location.
2. Customize keyvalues to achieve deserved effect:
name --> required to activate effect in game.
duration --> time for screen to get full transparency of effect. Fading duration.
For fade from duration is a time for screen to get full opaque.
hold time --> how long the solid color or filter stay on-screen after fade
(or before fade if fade from flag is selected). Max hold time is 10 seconds.
fade alpha --> final effect transparency, 0 mean opaque.
fade color --> color of filter.
3. Flags to customize:
fade from --> reverse the effect, make fade out.
modulate --> apply nice color filter instead of solid color.
activator only --> only the player who called this entity see the effect.
Otherwise all players are affected by screen fading.
4. Now you need to enable env_fade effect by triggering it (by button, trigger e.t.c.).
See subsection below if you want to make screen filter last forever.
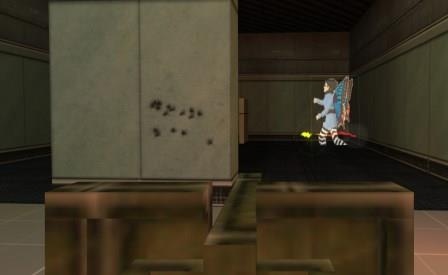
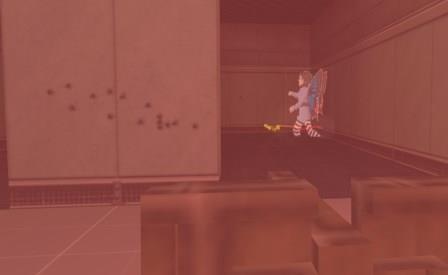
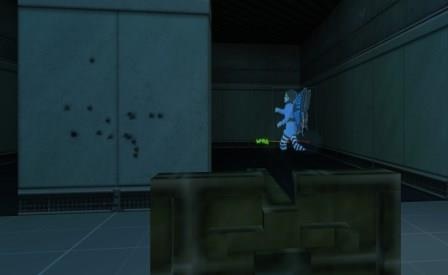
Normal Screen without fade Screen with red fade effect and 135 alpha Screen with blue fade effect and modulate flag
How to set up infinite fade hold time.
Hold time of env_fade can not be set to infinite, but there is a way to make an infinite hold time by creating trigger loop event.
A. Create env_fade with deserved settings, place two trigger_relays on map. Name first trigger_relay,
then give the same name to env_fade and second trigger_relay.
B. Make sure that remove on fire flag isn't selected in both trigger_relays. Go to keyvalues of trigger_relays
and change the trigger state to "On".
C. Place button or trigger that will activate trigger_relay with unique name. Change the entities keyvalues
as it shown below:

As you can see, the "trigger_relay 1" triggers "trigger_relay 2" and "env_fade". "Trigger_relay 2" triggers "trigger_relay 1" and this is looped as long as trigger_relays exists. Env_fade must have duration different than "0", and fade from flag must be selected because of undesirable fade in effect that may occur when triggering env_fade over and over again.
Bubbles
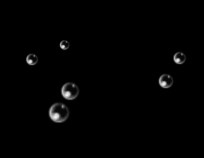 Bubbles are little sprites that generates within env_bubbles brush entity. Bubbles moves horizontally from bottom to top of the trigger volume. Bubbles are little sprites that generates within env_bubbles brush entity. Bubbles moves horizontally from bottom to top of the trigger volume.
1. Create env_bubbles brush with trigger texture. The whole trigger volume will generate bubbles with customize speed, frequency and density.
2. Set keyvalues:
name --> required if you want your bubbles be able to be enabled/disabled dynamically while
in game (e.g. by triggering it). Useful for rising water.
bubble frequency --> how often new group of bubbles appear.
bubble density --> how many bubbles appears per group.
speed of current --> how fast bubbles moves.
3. There is start off flag to select in the flags tab. Use it when there is a possibility to enable env_bubbles in game by
triggering it.
Directional Blood
 It is possible to emit blood in certain position and direction of your choice.
1. Place env_blood in a location you wish blood to be emitted.
2. Set keyvalues:
name --> required to activate the effect by triggering env_blood.
pitch yaw roll --> direction of blood trail.
blood color --> choose between yellow and red blood.
amount of blood --> how many blood env_blood produce.
3. Set flags:
random direction --> the blood splatters into random direction instead of direction specified in pitch yaw roll.
blood stream --> emit blood trail instead of point based blood.
spray decal --> apply blood decal whenever blood is emitted.
on player --> blood will appear on the player- activator of the event.
Screen Shaking
The only good method to make earthquake. Remember to apply some sound too!
1. Place env_shake into the map in any location.
2. Set keyvalues:
name --> required to activate screen shake by triggering env_shake.
amplitude --> how strong the shake is.
duration --> how long the effect lasts.
frequency --> how many shakes occurs (per second).
3. Set global shake flag if you want effect everywhere (disables effect radius).
Model Shooter
 You can spawn group of any models into your map. They will fall into the ground
with specified velocity and random range. You can use sprite instead of model.
For human gibs with blood splatters you can use gibshooter instead.
1. Place env_shooter on the map. This is spawning point of models.
2. Define keyvalues:
name --> required to spawn models in game by triggering this entity.
delay between shots --> how long it takes to spawn another model after
previous one has appear. Try to keep this value more than 0.
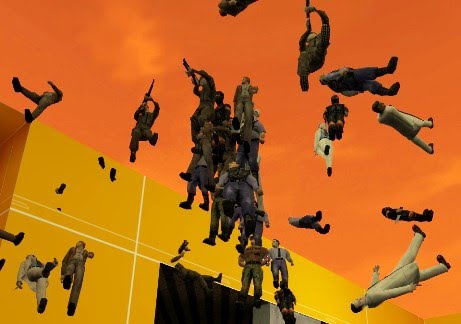 gib velocity --> force in which models will be thrown. gib velocity --> force in which models will be thrown.
course variance --> random throw range.
gib life --> how long the thrown models lasts.
model or sprite name --> path of model/sprite location to use.
material sound --> what kind of sound gibs plays when hitting the surface.
gib scale --> scale multiplier for model/sprite.
gib skin --> model skin to use if there is more than one for used model.
3. Enable repeatable flag if env_shooter can be triggered more than once.
Using monster models, especially otis and scientist models may be pretty funny.
Funnel
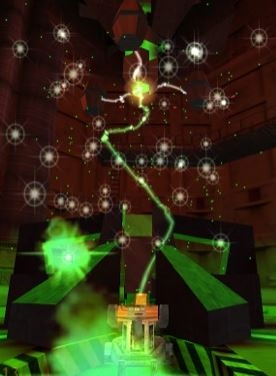 Funnel spawns and pull specified sprites into the env_funnel location. Effect can be reversed. Funnel spawns and pull specified sprites into the env_funnel location. Effect can be reversed.
1. Place env_funnel in location of you wish.
2. Define keyvalues:
name --> required to activate this entity through trigger.
custom sprite --> name of the sprite to use. Uses "flare6.spr" if not specified.
3. Define flags:
reverse --> reverse sprites move direction.
reusable --> can be multiply triggered.
Moving Sprite (Sprite Train)
 It is possible to make sprite moving along created path (by path_corner entities).
1. Place env_spritetrain on the map. No matter which location you choose, the sprite will start at first stop target point.
2. Place some path_corners on the map. The sprite will travel from one path corner
to another. Last path_corner may refer to the first one, so the movement will be looped. First path corner is a starting point of sprite.
3. Prepare keyvalues:
name --> required to activate this entity through trigger.
first stop target --> name of first path_corner, starting point of sprite.
sprite name --> path to sprite file to use.
speed --> path movement speed.
sprite scale --> scale multiplier for sprite.
4. Go into path_corner keyvalues. Every path_corner can be configured differently.
name--> set the name of the path. It is required.
next stop target--> the name of the next path_corner that train will travel after reaching current destination.
fire on arrive--> entity to trigger on arrive at this point.
wait here (sec)--> how many seconds the train waiting at this point (before continuing travel).
new train speed--> set a new train speed after reaching this point.
new train rotation speed--> set a new rotation speed after reaching this point.
5. Set the flags of path_corners:
wait for retrigger--> the sprite stops it's movement here. Train will continue it's travel when triggered.
teleport to this--> immediately teleport to this point instead of moving.
fire once--> the fire on arrive will trigger only once. Used when path is reached multiple times but we want to send trigger
only once from this point.
random targets--> the next destination will be randomly choose from path_corners with the same name.
Here's mechanics of connecting path_corners. 
Xen Teleportation Spawn Effect
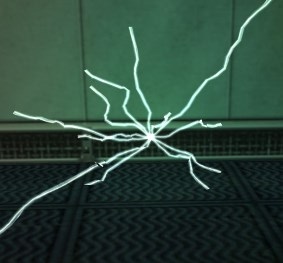 Env_xenmaker is an entity that generates all required teleport spawn effects. Env_xenmaker is an entity that generates all required teleport spawn effects.
Monsters can be spawned through this entity. Effects are customizable.
1. Place env_xenmaker in location of your wish.
2. Set keyvalues if needed:
name --> required to activate this entity by triggering it (by button, trigger e.t.c.).
monster type --> name of monster entity to spawn on effect activation.
beam radius --> radius of randomly generated beam effect.
beam alpha --> transparency of the beam. 0 for invisible.
beam count --> how many beams appear on effect activation.
light radius --> light strength.
sprite framerate --> the frame rate of showed sprite.
sprite scale --> scale multiplier of the sprite.
sprite alpha --> transparency of the sprite. 0 for invisible.
3. Set flags:
try once --> when monster spawn point is blocked by someone of something, the env_xenmaker attempts to spawn it as
long as there is enough space for monster to appear. Selecting flag disables this feature.
no spawn --> do not spawn monster, show only visuals.
You can't disable sound effect of this entity. Keep in mind that triggering more than one env_xenmaker at one time emits
very loud sound effects.
|


 Smoke can be made through env_sprite, but there is one more entity that emits big,



 Bubbles are little sprites that generates within env_bubbles brush entity.
  gib velocity --> force in which models will be thrown.
 Env_xenmaker is an entity that generates all required teleport spawn effects.